Setting Up a Smart Home Hub Without Breaking the Bank
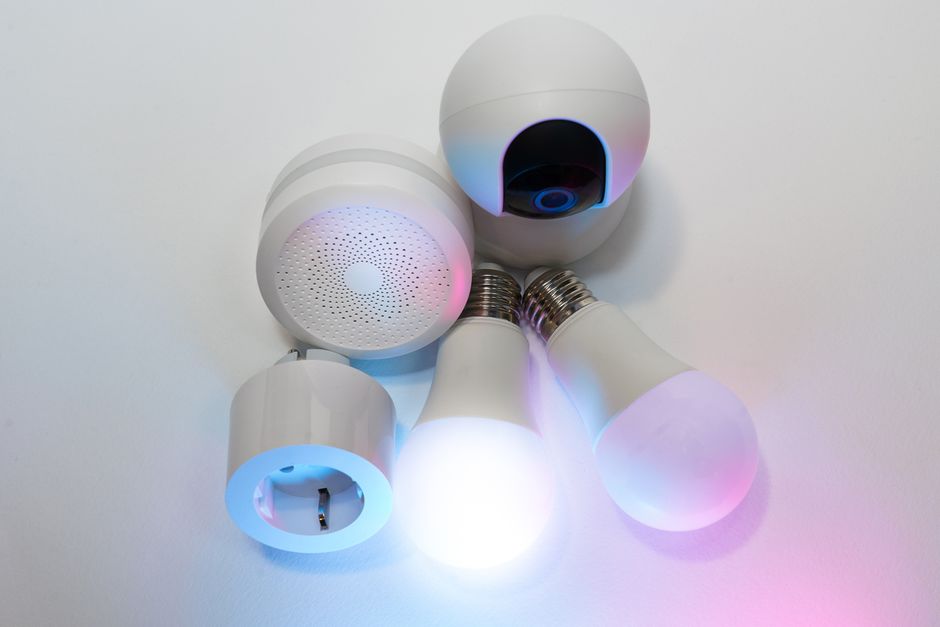
Building a connected home environment often begins with a central device that can coordinate different gadgets. A smart home hub serves as that central point, allowing users to manage lighting, outlets, and audio devices from a single interface. Many assume that such a system requires a significant investment, but affordable options exist that provide a solid foundation for automation. This article outlines a practical, step-by-step approach to setting up a smart home hub using budget-friendly components, focusing on lights, plugs, and a speaker.
The goal is to demonstrate how a single hub can integrate multiple types of devices without requiring expensive proprietary systems. The process involves selecting a compatible hub, connecting it to a home network, and then pairing each device type one by one. Throughout the guide, emphasis is placed on understanding the underlying setup procedures and the considerations that affect device compatibility and performance.
Selecting an Affordable Smart Hub
The first step is choosing a hub that balances cost with functionality. Many budget-friendly hubs support common wireless protocols such as Zigbee, Z-Wave, and Wi-Fi. When evaluating options, it is helpful to consider the types of devices already owned or planned for purchase. For instance, if most smart lights and plugs use Zigbee, a hub that includes a Zigbee radio will likely be more reliable than one relying solely on Wi-Fi. Some hubs also offer Bluetooth support for close-range pairing.
Price ranges vary, but devices in the $30 to $60 category often provide sufficient features for a basic setup. It is worth noting that some smart speakers come with built-in hub capabilities, which can reduce the need for a separate hub. However, for maximum flexibility, a dedicated hub that supports multiple protocols may be preferable. Compatibility lists provided by manufacturers can help clarify which bulbs, plugs, and speakers will work without extra adapters.
Another factor is the ecosystem or app that accompanies the hub. A user-friendly mobile application simplifies the initial configuration and ongoing management. Some hubs offer web interfaces as well, though mobile apps are more common. Checking recent user feedback about app stability and ease of use can be informative before making a purchase.
Initial Hub Setup and Network Connection
Once a hub is selected, the setup process typically begins with unboxing and powering the device. Most hubs require a stable internet connection via Ethernet or Wi-Fi. Ethernet is generally recommended for reliability, but many affordable hubs support Wi-Fi as well. The hub should be placed in a central location within the home, away from large metal objects or thick walls that could interfere with wireless signals.
The next step involves downloading the companion app and creating an account. After logging in, the app usually guides the user through connecting the hub to the home network. This may involve pressing a physical button on the hub or scanning a QR code. Firmware updates are common during initial setup, and allowing the hub to update fully ensures compatibility with newer devices. The entire process can take between 10 and 20 minutes.
After the hub is online, it is advisable to name the hub in the app and set the correct time zone. These settings affect automation schedules and event logging. Some hubs also allow the creation of a home location used for geofencing features later. At this stage, the hub is ready to discover and pair devices.
Connecting Smart Lights
Smart lights are among the most straightforward devices to integrate. Most smart bulbs use either Wi-Fi or Zigbee. For Wi-Fi bulbs, the hub may communicate with them directly through the home network. For Zigbee bulbs, the hub acts as a coordinator, creating a mesh network. To begin pairing, the bulb should be screwed into a socket and powered on. The app usually has a dedicated section for adding lights, often labeled “Add Device” or “Pair.”
The user may be prompted to put the bulb into pairing mode, which is commonly done by turning the light switch on and off a certain number of times or using the bulb’s native app if it has one. Once the hub discovers the bulb, the app asks for a name and room assignment. Assigning bulbs to logical groups, such as “Living Room” or “Bedroom,” makes them easier to control later. It is possible to add multiple bulbs one after another, though some hubs support bulk pairing if the bulbs are in discovery mode simultaneously.
After pairing, basic controls such as on/off, dimming (if supported), and color changes become available through the hub’s app. The hub can also be used to create schedules, for example, turning lights on at sunset. One important consideration is the maximum number of bulbs a hub can handle. Budget hubs often support dozens of devices, but checking the manufacturer’s specifications helps avoid overloading the system.
Adding Smart Plugs
Smart plugs allow any standard appliance to be controlled remotely. The pairing procedure for plugs is similar to that of lights. Most smart plugs are Wi-Fi or Zigbee based. After plugging the smart plug into a wall outlet and ensuring it is receiving power, the same “Add Device” process in the hub’s app is used. The plug may have a button that triggers pairing mode when pressed.
Once discovered, the plug can be renamed and assigned to a room or group. Many hubs allow the plug to be part of routines or scenes. For example, a plug connected to a lamp can be grouped with the smart lights in the same room so that one command controls both. Plugs are also useful for scheduling—turning on a coffee maker in the morning or a fan during hot afternoons.
It is worth noting that some smart plugs include energy monitoring features, which report power consumption through the hub’s app. This data can help users track usage patterns but is not necessary for basic automation. As with lights, the limit on the number of plugs that can be paired depends on the hub’s capacity. Spreading devices across different wireless channels or using repeaters (if supported) can improve reliability in larger homes.
Integrating a Smart Speaker
Smart speakers provide voice control and often serve as an additional interface for the hub. Many affordable speakers support voice assistants like Amazon Alexa or Google Assistant. To connect a speaker to the hub, the speaker must be set up on the same network and linked to the hub’s account. This is typically done through the speaker’s app or via the hub’s app under a “Voice Assistants” or “Integrations” section.
The process usually involves logging into the hub’s account from the speaker’s app, or vice versa, and granting permissions to control devices. Once linked, the speaker can be used to issue voice commands such as turning off lights or adjusting a plug. Some hubs also allow the speaker to act as an audio output for notifications or doorbell chimes. The speaker itself may be paired as a media device that can play music from streaming services when triggered by routines.
It is important to verify that the hub and speaker are compatible before purchase. Most hub manufacturers provide a list of supported voice assistants and speaker models. If the speaker has a built-in hub functionality (like some smart displays), a separate hub might still be needed if the speaker does not support the wireless protocols used by the lights and plugs. In many budget setups, using a separate hub plus a basic speaker provides the most flexibility without increasing cost significantly.
Expanding and Troubleshooting the System
After the initial devices are connected, the hub can be expanded with additional lights, plugs, or sensors over time. Many hubs support the addition of motion sensors, door/window contacts, and thermostats, which can trigger automations based on environmental changes. For example, a motion sensor can be paired to turn on lights when someone enters a room. The process for adding such devices follows the same pairing steps, though each device may have unique pairing instructions.
Common issues during setup include devices not being discovered, intermittent disconnections, or delays in command execution. These problems often stem from Wi-Fi congestion, interference, or exceeding the hub’s device limit. Moving the hub closer to devices or adding a Wi-Fi extender for Wi-Fi based devices can help. For Zigbee/Z-Wave networks, adding mains-powered devices (like smart plugs) that act as repeaters can extend the range. If a device fails to pair, resetting the device and restarting the hub before trying again is a typical troubleshooting step.
Regular firmware updates for both the hub and the devices are recommended to maintain stability and security. Most hubs offer automatic update options in the settings. It is also useful to periodically review the device list in the app and remove any that are no longer in use to free up capacity. By starting with a single affordable hub and a few core devices, users can gradually build a personalized smart home system without a large upfront investment.